The much awaited before & after pictures.


 You can tell from the looks on their faces they are trying to figure out how to run the cash register.
 He gave them a silver dollar with an hour glass with this piece of advice - "Time is money."
 He paid the rest of his tab in $2 bills.
 Ray said the frozen yogurt was great!
 Our official sign was installed.. here is the first part of it.
 Tyler washed the windows in preparation for our window decals.

 Our dispensers came in as well.
  Our metal sign is a great edition. However, and absolute beast to hang, into brick no less. So we did have a little help with this one.
 Complete & ready to top off someone's froyo!
 Cereal, nuts, candy, fruit, cakes, etc.. over 50 toppings to choose from!
 Those top hat signs are also my creation. They are chalk boards so we can switch out the flavors easily.

 All the Smith men there to help!
 The wall was finished all that was left was the grout.
 Apparently grout isn't as easy as they make it look on TV. They finished about half the wall and quit...and hired someone to finish. We were in a crunch for time because we were trying to open and this was just the easiest solution.
 Zach and Tyler cheer to the first batch of froyo!
 The back of the store was carpet. After we took up the carpet we found that they really enjoyed the glue they used under the carpet. After working for weeks on getting all the glue up, it was time to acid stain the concrete. We had been planning to do this all along. We had seen it in some other food places and loved the effect.

 As it turned out, it didn't look as good as we had hoped. It could have been a number of things but we had to do something about it fast.
 We started on this at 9:00 PM and got done about 2:00 AM

 They also took out all the ceiling back here.
 Just a small amount of the actually mess that was/is left.
 Our separate HVAC was installed recently. Thankfully the exposed/metal look went well with our decor. However, the vents they put in were white. It is a good thing they make silver spray paint!
 And, why not have another excuse to use the lift again? This time to remove an exit sign. We will be recycling it and putting it in a new location because these front doors will be changing once the dividing wall is up.
 With very little time left to get the small stuff left on the list. We spend all day Saturday picking up the last minute needed items.
 There is literally dust everywhere and only more to come. We have tried our hardest to clean as we go but there is only so much you can do. In our trips to pick up stuff we got this handy duster. Tyler wanted to try it out.
 Ah, the door to no where. I am sure this will be a ever constant question as to where it goes. But, when you can't change something, embrace it. This door literally leads no where. We aren't even sure what it used to go to. It is locked and we don't own the key so we can't even open it. For a lack of a better way to cover it up. We are embracing it; we painted it "melted lava."
 After the toppings counter was finished we started on the register counter. Same basic structure but different shape. I think even Zach and Tyler were impressed with their new found skills.
 Just to show you we like to have fun while we work, Zach and Tyler "trying out" the new counter with play money and sound effects such as "Cha-Ching!"


 Marked it with a chalk line and crossed our fingers it was straight when we got done cutting. And, believe it or not they were!
 (Please note that the register counter is still missing it's counter top. The delivery people broke off a corner trying to get it in the door...but we eventually got a replacement!)
 Another added feature to the counters were red rope lights.
 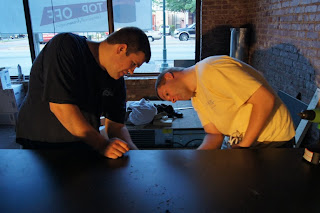 I can't help but love how they turned out.

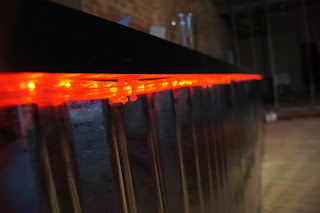 Counters - complete!